
Build a 24/7 AI customer support agent that searches your KB, opens Zendesk tickets, and follows up on stale ones. Step-by-step in under 15 minutes.
Most support teams lose hours every day to Tier-1 questions that already have answers in the help docs. The fix isn't more agents, it's an AI agent that searches your knowledge base, opens a Zendesk ticket only when it genuinely needs to, and nudges you about stale ones. Here's how to build one with Lua.
What you'll build
By the end of this guide, you'll have a customer support agent that:
- Answers product questions instantly by searching your help docs with semantic vector search
- Opens a Zendesk ticket automatically when the knowledge base can't resolve the question
- Tracks the status of existing tickets and gives customers updates on demand
- Runs a daily job that nudges customers about stale open tickets
- Works across email, chat, WhatsApp, or your website widget without changing the agent's code
Prerequisites
Before you start, make sure you have:
- Node.js 18 or higher (run
node --versionto check) - npm (comes with Node)
- A Lua account at heylua.ai
- Cursor installed, or another AI coding tool that supports MCP
- A Zendesk account (sandbox or production) with API access enabled
Option A — Build with the Lua CLI
Step 0: Environment setup
Install the Lua CLI globally:
npm install -g lua-cliConfirm it installed:
lua --versionYou should see a version number. If you get a "not recognized" error, close and reopen your terminal first, then try again.
Authenticate against your Lua account:
lua auth configureEnter the email tied to your Lua workspace. You'll get a 6-digit code by email within about 30 seconds. Paste it back into the terminal. The CLI saves an API key locally so you don't have to log in again.
Create a project folder and move into it:
mkdir customer-support-agent
cd customer-support-agent
lua init
Pick Create new agent when prompted, name it customer-support-agent, and create a new organisation if you don't have one yet. The CLI installs dependencies and scaffolds the project structure.
Open the project in Cursor and connect Lua's docs MCP so Cursor can query the Lua documentation while you build:
cursor .Create a file at .cursor/mcp.json with this content:
{
  "mcpServers": {
    "lua-docs": {
      "url": "https://docs.heylua.ai/mcp"
    }
  }
}
Reload Cursor (Cmd/Ctrl + Shift + P, then "Reload Window"). The MCP server gives Cursor direct access to docs.heylua.ai, which makes the prompts in the next steps much more reliable.
Step 1: Add the knowledge base search skill
The first thing your support agent needs to do is search your help docs before doing anything else. Tier-1 questions almost always have answers buried in existing articles. Lua's Data API ships with semantic vector search out of the box, so you don't need to wire up a separate vector DB.
In Cursor's chat panel, paste this prompt:
Cursor prompt — knowledge base skill (click to expand)
Create a LuaTool at
src/tools/SearchKnowledgeBase.tsthat takes a customer's question, runs a semantic vector search against theknowledge-basecollection using Lua's Data API (Data.search(collection, query, limit, threshold)), and returns the top matching articles with title, content, category, and a relevance percentage.The tool should:
- Be named
search_knowledge_base- Accept one input
query(string)- Use
Data.search('knowledge-base', query, 5, 0.7)(limit 5, similarity threshold 0.7)- Return
{ found, message, articles }wherearticlesincludestitle,content,category,relevancePercent- Handle the empty-results case gracefully with
found: falseAlso create a LuaSkill at
src/skills/customerSupport.skill.tsthat wraps this tool. The skill'scontextshould instruct the agent to always search the knowledge base first before any other action.Update
src/index.tsto import the skill and add it to theLuaAgentconfiguration. Don't add a model property — use Lua's default.Finally, generate a
seed-kb.tsscript in the project root that populates theknowledge-basecollection with 10 sample help articles. Cover common Tier-1 topics: password reset, shipping and delivery times, order tracking, refunds, account settings, billing, returns, account security, cancellations, and payment methods.
Seed the knowledge base before testing:
npx tsx seed-kb.tsThen verify the skill compiles cleanly:
lua compileYou should see something like:
✅ Compiled 3 primitives (1 agent, 1 skill, 1 tool)The "3 primitives" count is your agent, your skill, and your one tool. As you add more tools that number will grow.
Step 2: Wire up Zendesk ticketing
When the knowledge base falls short, your agent needs to escalate. That means three more tools: create a ticket, check its status, and add public comments to it. All three talk to the same Zendesk REST API using Basic auth.
Before you can run these, add your Zendesk credentials to .env:
ZENDESK_SUBDOMAIN=YOUR_SUBDOMAIN
ZENDESK_EMAIL=YOUR_ZENDESK_EMAIL
ZENDESK_API_KEY=YOUR_ZENDESK_API_TOKEN
To get the API token: Zendesk Admin Center → Apps and integrations → APIs → Zendesk API → enable Token access → Add API token. Zendesk only shows the token once, so copy it immediately.
Then paste this prompt into Cursor:
Cursor prompt — Zendesk ticketing tools (click to expand)
Create three LuaTools in
src/tools/for Zendesk ticketing. All three should:
- Use HTTP Basic auth with the credential pattern
${ZENDESK_EMAIL}/token:${ZENDESK_API_KEY}, base64-encoded- Read
ZENDESK_SUBDOMAIN,ZENDESK_EMAIL, andZENDESK_API_KEYfrom env viaenv()- Return a clear error if any env var is missing
- Use Zod schemas for inputs
Tool 1,
CreateTicket.ts:
- Name:
create_ticket- Inputs:
subject(string),description(string),customerEmail(valid email),priority(enum: low/normal/high/urgent, default normal)- POST to
https://${subdomain}.zendesk.com/api/v2/tickets.json- On success, also write a mirror record to
Data.create('support-tickets', ...)withzendeskId,subject,customerEmail,priority,status: 'open',createdAt,updatedAt. The follow-up job will query this collection later.- Return
{ success, ticketId, message }Tool 2,
GetTicketStatus.ts:
- Name:
get_ticket_status- Input:
ticketId(positive integer)- GET
/api/v2/tickets/{id}.json- Map Zendesk's six statuses (new, open, pending, hold, solved, closed) to human-readable labels
- Handle 404 as a distinct error case
- Return
{ success, ticketId, subject, status, statusMessage, createdAt, lastUpdated }Tool 3,
UpdateTicket.ts:
- Name:
update_ticket- Inputs:
ticketId(positive integer),comment(string)- PUT
/api/v2/tickets/{id}.jsonwith body{ ticket: { comment: { body, public: true } } }. Thepublic: trueis critical — without it the comment becomes an internal note the customer never sees.- Return
{ success, ticketId, message }Finally, add all three tools to the existing
customerSupport.skill.tsso the skill now contains four tools total. Update the skill'scontextto instruct the agent: search the knowledge base first; only create a ticket if the KB returns nothing useful; always confirm the customer's email before callingcreate_ticket; useget_ticket_statuswhen a customer asks about an existing ticket.
Compile:
lua compileYou should see:
✅ Compiled 6 primitives (1 agent, 1 skill, 4 tools)Step 3: Add a daily follow-up job
A support agent that only responds when spoken to misses half the job. The other half is chasing tickets that have gone quiet. Add a LuaJob that runs once a day, finds tickets sitting open without a recent update, and posts a friendly follow-up.
In Cursor:
Cursor prompt — daily follow-up job (click to expand)
Create a
LuaJobatsrc/jobs/TicketFollowUp.tsnamedticket-follow-up. Schedule:{ type: 'cron', expression: '0 10 * * *' }(10 AM UTC daily). Timeout 300 seconds, retry up to 2 attempts with 60s backoff.The job:
- Reads
FOLLOWUP_HOURSfrom env (default 24)- Queries our Data mirror with
Data.get('support-tickets', { status: { $ne: 'solved' } }, 1, 100)- For each ticket where
(now - updatedAt) > FOLLOWUP_HOURSAND(now - (lastNudgedAt ?? 0)) > 24h, PUTs a public follow-up comment to Zendesk: "Hi, this is your support assistant following up. Your ticket is still open. Let us know if there's anything more we can help with, or reply with 'resolved' if everything's sorted. (Automated message.)"- After commenting, patches the Data record with
lastNudgedAt: new Date().toISOString()so the next run doesn't double-nudge- Returns
{ followedUp, total, errors? }Add
TicketFollowUpto thejobs: []array insrc/index.ts.
Add to .env:
FOLLOWUP_HOURS=24Compile:
lua compileYou should see all seven primitives:
✅ Compiled 7 primitives (1 agent, 1 skill, 4 tools, 1 job)Step 4: Set the persona and test
Last step on the CLI side: give your agent a personality and run it.
In Cursor:
Cursor prompt — set the Alex persona (click to expand)
Replace the persona in
src/index.tswith this verbatim text:"You are Alex, a customer support specialist. Your role: help customers find answers, search the knowledge base for solutions, create support tickets when needed, track and update existing tickets, and provide empathetic, professional support. Communication style: patient and empathetic, clear and professional, solution-oriented, reassuring and supportive. Workflow: first search the knowledge base for answers; if no good result, ask the customer for their name and email (you need both before opening a ticket) and offer to create one; for existing tickets, help track status; for urgent issues, escalate to priority support. Never mention internal tooling, the Data API, vector search, or webhook plumbing to the customer."
Update the agent's
namefield toAlex. Don't add a model property — use the Lua default.
Seed the knowledge base one more time if you haven't already:
npx tsx seed-kb.tsThen open a sandbox chat:
lua chat -e sandboxTry these prompts in order:
- "I forgot my password" — Alex should hit the KB and walk you through the reset flow
- "How long does shipping take?" — another KB hit
- "My order #12345 still hasn't arrived" — Alex should ask for your name and email, then create a Zendesk ticket
- "What's the status of ticket [paste the ID Alex just gave you]?" — Alex should call
get_ticket_statusand return the human-readable status
If all four work, your CLI build is done.
This setup also works with Claude Code, Windsurf, and other MCP-aware editors — point those tools at the same https://docs.heylua.ai/mcp endpoint.
Option B — Build in the Lua admin portal
The CLI version above is built around custom code. The portal gives you a no-code surface for the parts of an agent that don't need custom logic — identity, knowledge, channels, and connected services. Most teams use both: the portal for setup, the CLI for custom skills.
Step 1: Pick a template and claim the agent
Go to heylua.ai and click Start Building. The Lua Agent Builder opens with a canvas on the left and a list of starting points on the right.
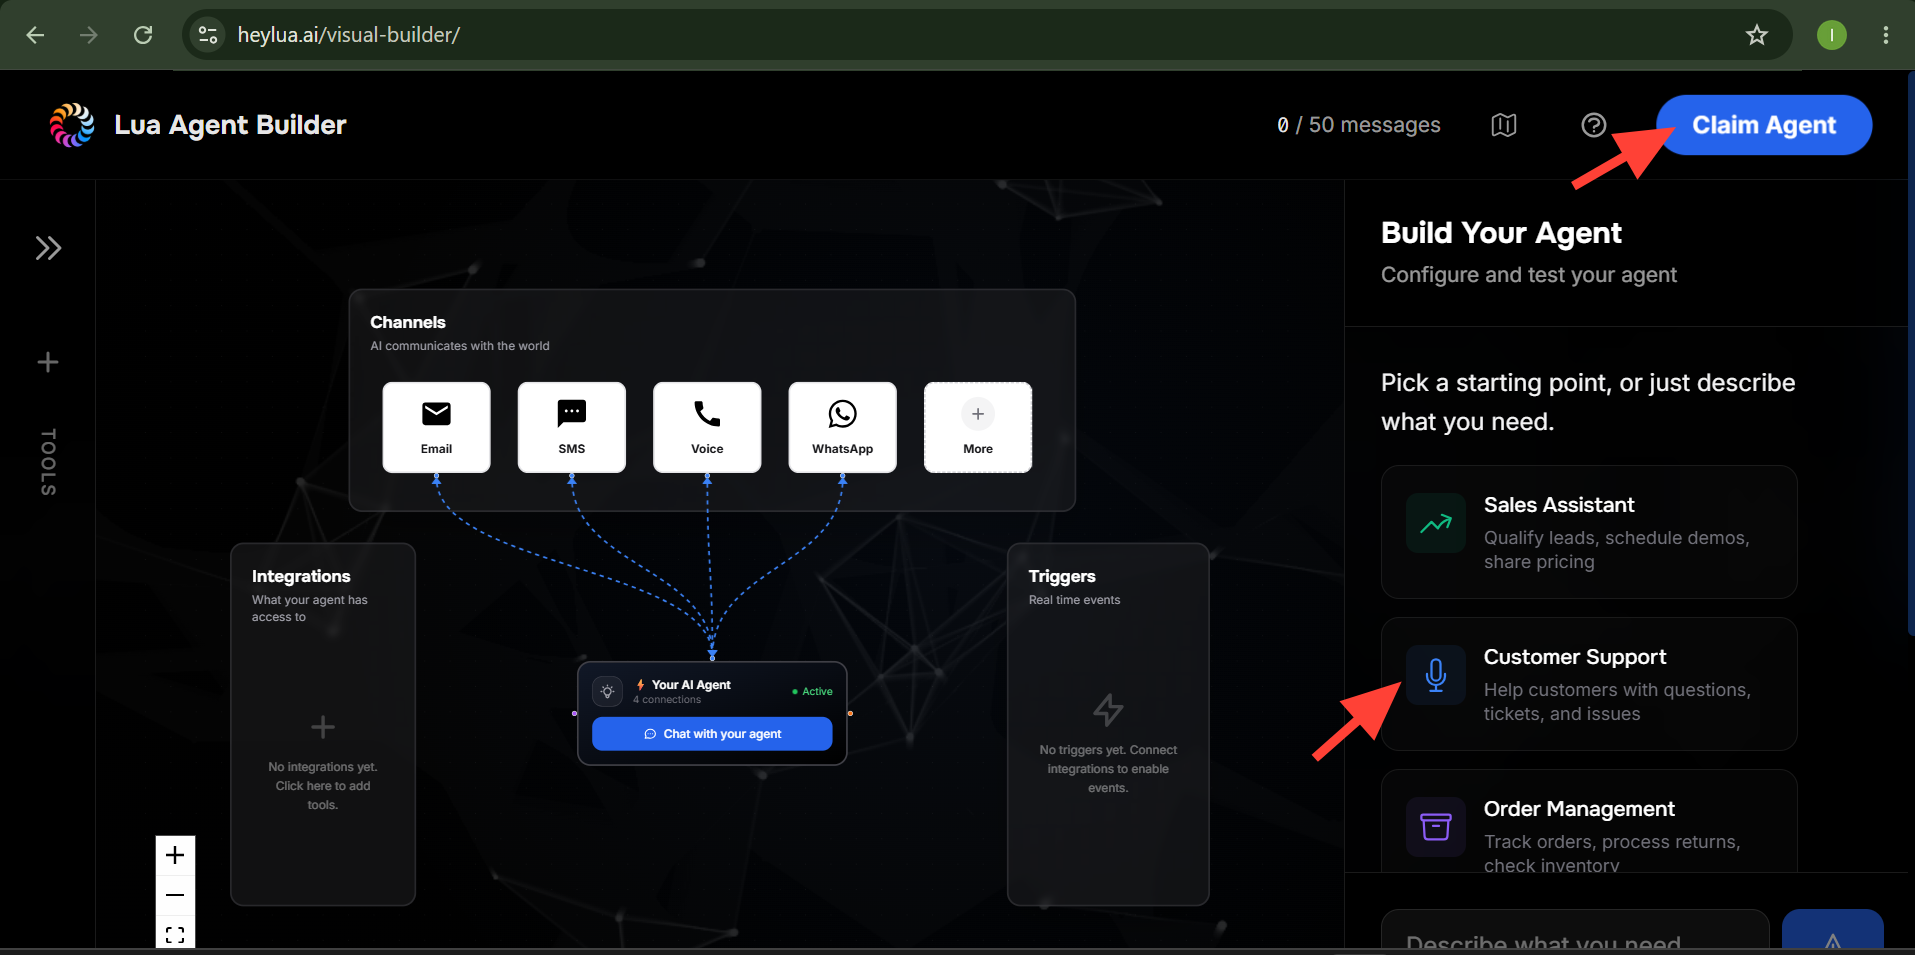
Pick Customer Support. The builder scaffolds a working agent with the four standard channels wired in. When you're ready, click Claim Agent in the top right and sign in. The agent gets linked to your Lua account.
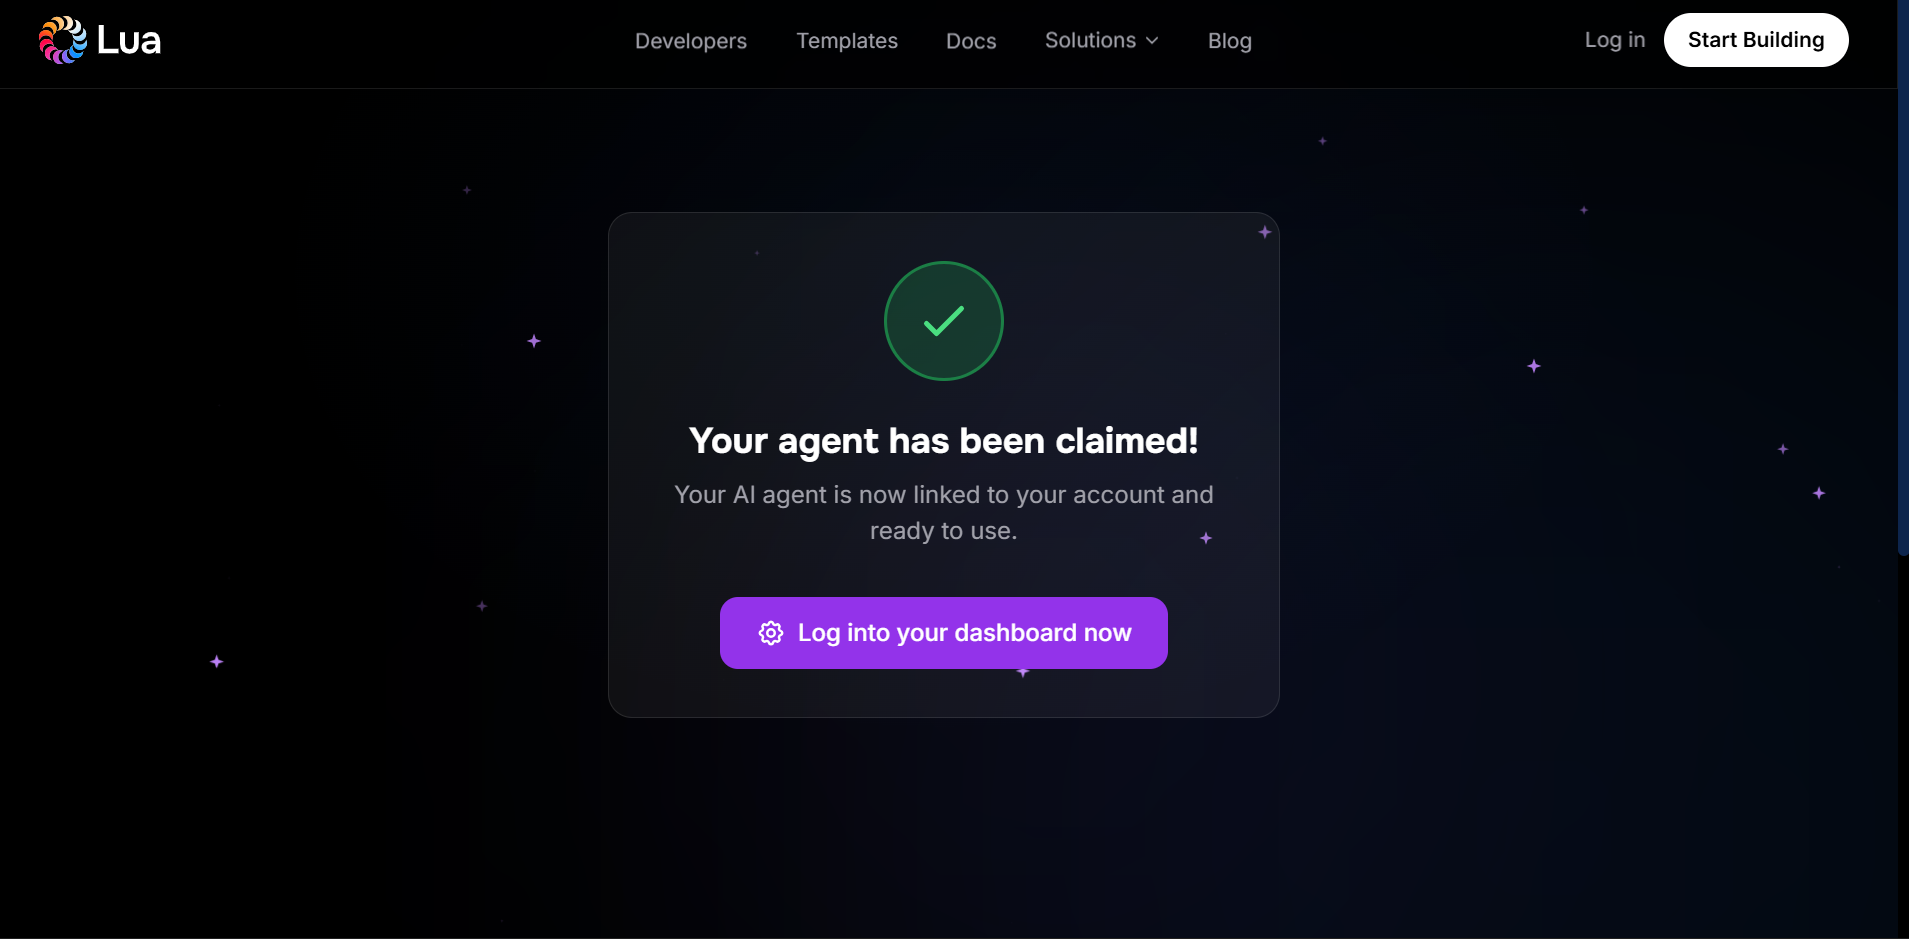
Step 2: Set the persona
Once you're in your agent's dashboard, click Persona in the right-hand Overview panel to expand it. Paste the same persona text you used in the CLI build:
You are Alex, a customer support specialist. Your role: help customers find answers, search the knowledge base for solutions, create support tickets when needed, track and update existing tickets, and provide empathetic, professional support. Communication style: patient and empathetic, clear and professional, solution-oriented, reassuring and supportive. Workflow: first search the knowledge base for answers; if no good result, ask the customer for their name and email (you need both before opening a ticket) and offer to create one; for existing tickets, help track status; for urgent issues, escalate to priority support. Never mention internal tooling, the Data API, vector search, or webhook plumbing to the customer.
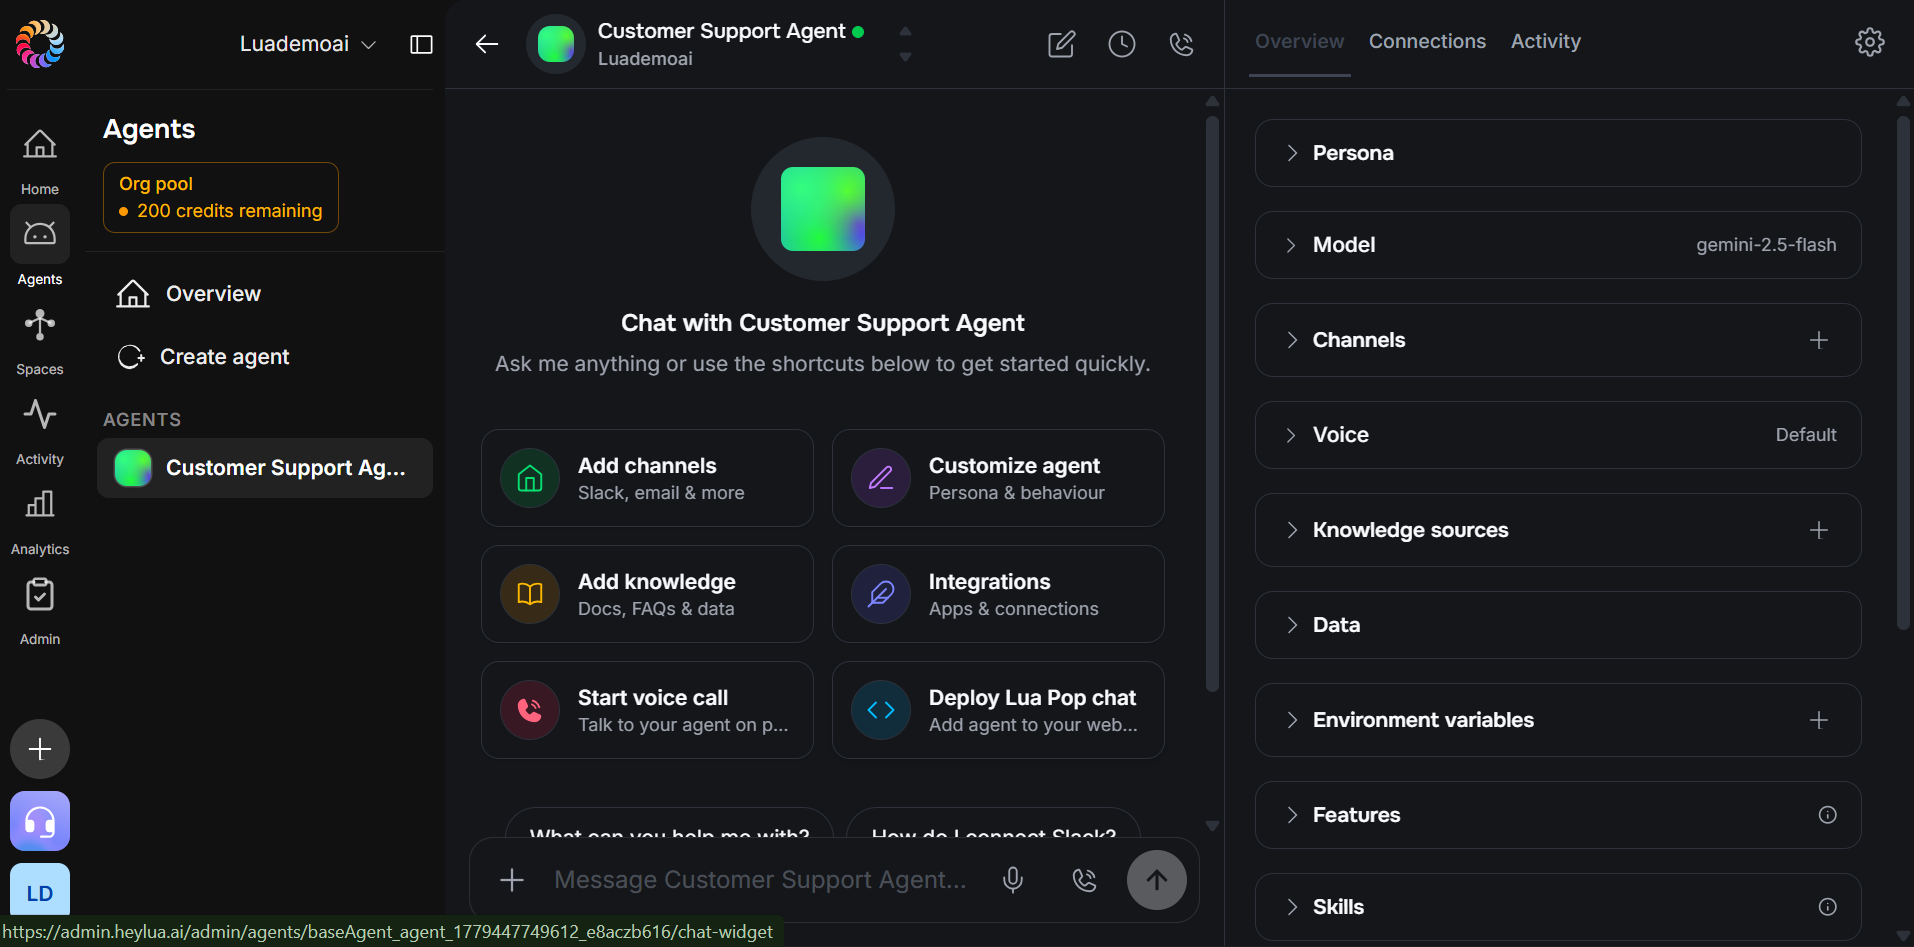
Save. The persona becomes the agent's system prompt.
Step 3: Add a knowledge base
Still on the agent's dashboard, find Knowledge sources in the right-hand panel and click the + button. The portal opens an "Add text resource" dialog with a Name field and a Content textarea.
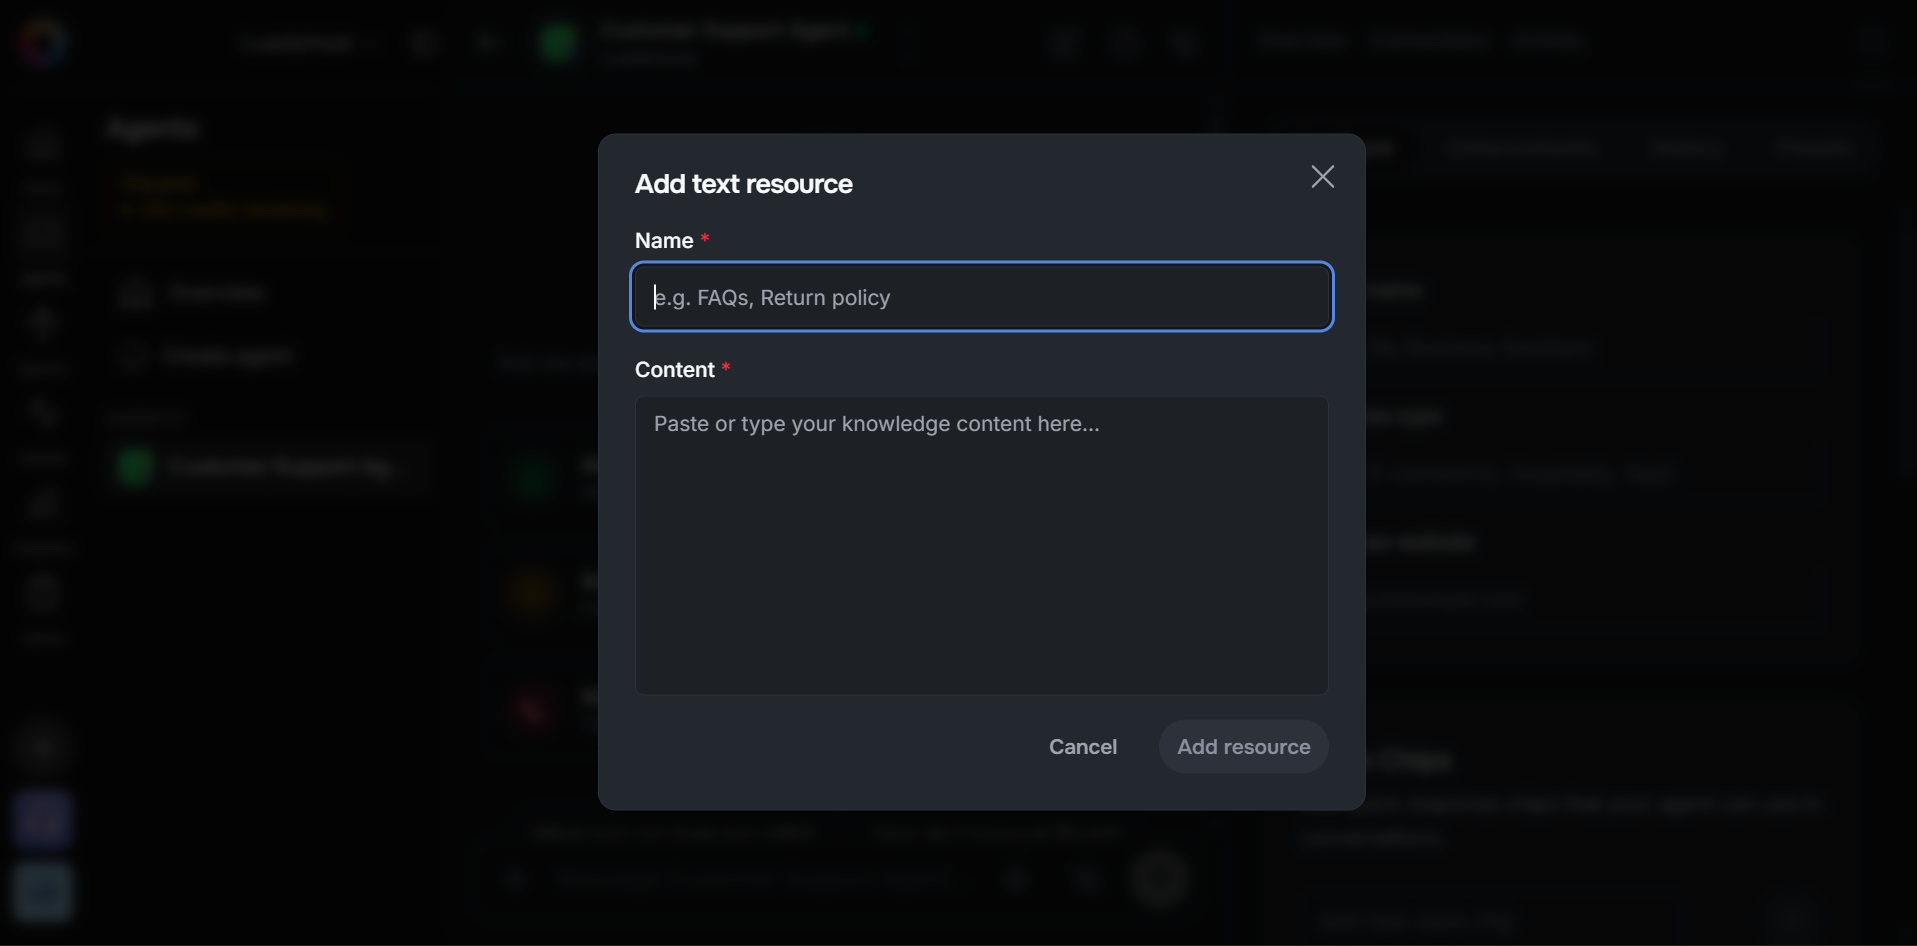
Paste in your help content one article at a time. For a quick test, start with three: a password-reset article, a shipping-times article, and a return-policy article. Give each a clear name so the agent can reference it cleanly.
For larger help libraries you'd want to bulk-import via the CLI's seed script (see Option A above), but the portal flow works fine for a handful of articles.
Step 4: Connect an integration
Open the Visual Builder view from your agent's dashboard. You'll see Channels at the top wired to your agent, with Integrations as an empty node on the left. Click the + on the Integrations node.
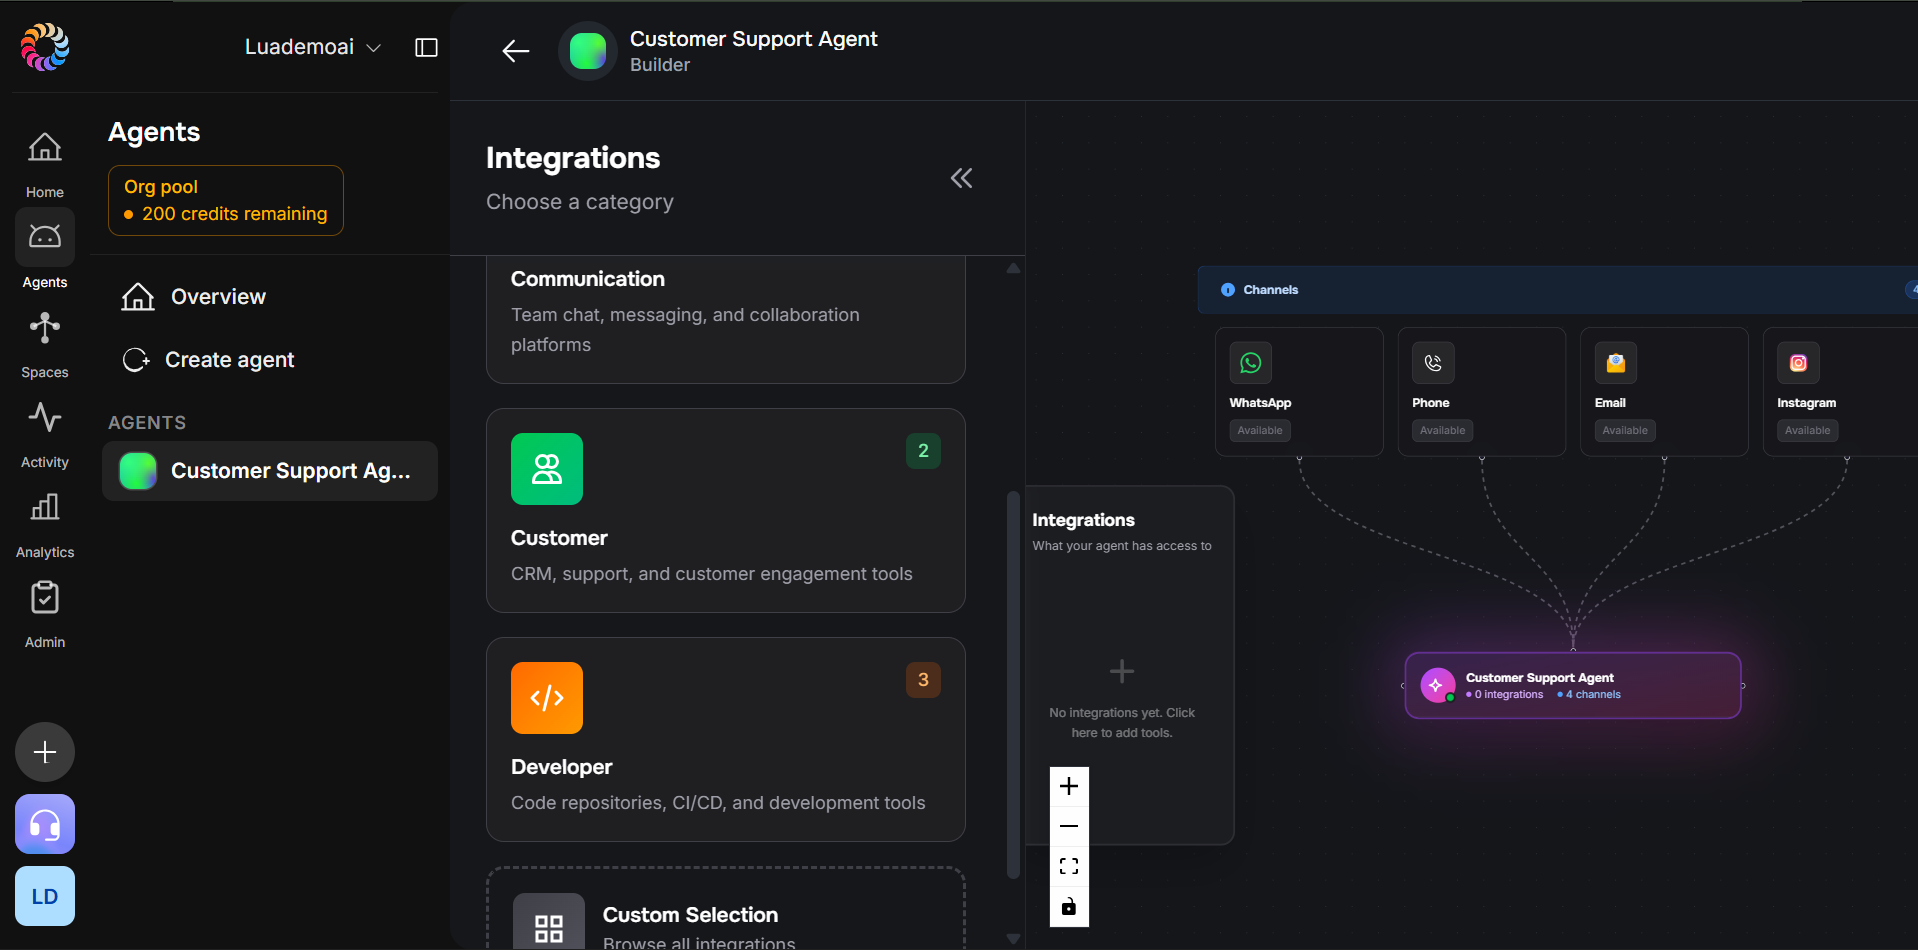
The integrations picker opens with categories: Communication, Customer, Developer, and Custom Selection. Pick Customer for support tools — Zendesk lives in here. Click it, follow the connection flow, and the integration appears on your agent's Visual Builder canvas.
For custom logic, drop to the CLI
For custom skills and tools — the Zendesk ticket creation, the daily follow-up job, the KB search behaviour — follow Option A above. The portal handles the setup surface; the CLI handles the custom behaviour. Most production agents use both.
Integration deep-dive
Zendesk
Generate an API token in Zendesk Admin Center → Apps and integrations → APIs → Zendesk API. Enable Token access if it's off, then click Add API token. Copy it immediately — Zendesk only shows the token once.
In your Lua project's .env file, set ZENDESK_SUBDOMAIN (the prefix before .zendesk.com), ZENDESK_EMAIL (the admin or agent email tied to the token), and ZENDESK_API_KEY (the token itself). The CLI tools you built in Step 2 read all three at runtime. With these in place, the agent can create, fetch, and comment on tickets through Zendesk's REST API using Basic auth.
Intercom
Intercom replaces the three Zendesk tools with calls to its Conversations API. Get an access token from Intercom's Developer Hub → your app → Authentication, then set INTERCOM_ACCESS_TOKEN in .env. The endpoint pattern changes from Zendesk's /api/v2/tickets.json to Intercom's https://api.intercom.io/conversations, and Intercom uses Bearer auth instead of Basic. The rest of the agent's logic — KB-first, escalate on miss, daily follow-up — stays the same. See Intercom's API docs for the request bodies.
Test it
Once both builds are wired up, the same four prompts work in either the CLI sandbox (lua chat -e sandbox) or the portal's built-in chat:
- "I forgot my password" — expect a KB hit walking the customer through password reset, no ticket created.
- "How long does shipping take?" — another KB hit, with shipping windows pulled from the seeded article.
- "My order #12345 still hasn't arrived" — Alex should ask for the customer's name and email, then create a Zendesk ticket. Check your Zendesk inbox to confirm the ticket appears.
- "What's the status of ticket [the ID Alex just returned]?" — Alex should call
get_ticket_statusand return a human-readable status like "Open — a support agent is actively working on your ticket."
If you want to see the tool calls happening in real time, run lua logs --type skill in a second terminal while you chat.
Common pitfalls
- The Lua CLI no longer includes example code by default. If you want the starter skill examples to learn from, use
lua init --with-examples. Without it,src/index.tsis mostly empty. - Forgetting
public: trueon ticket comments. Zendesk defaults new comments to internal notes. If your agent's follow-up comments aren't reaching the customer, this is almost certainly why. - Missing Zendesk env vars. All three (
ZENDESK_SUBDOMAIN,ZENDESK_EMAIL,ZENDESK_API_KEY) must be set, and the API token must have token access enabled in Zendesk Admin. The tools fail with a clear error if any of the three is missing. - Cron schedules run in UTC.
0 10 * * *fires at 10 AM UTC, not your local time. Add atimezonefield to the schedule config if you want local-time scheduling. - Production env vars are separate from sandbox. Before
lua deploy, push your Zendesk credentials to the production environment too. Runlua env --helpto see the exact flags your CLI version exposes.
Next steps
You've got a customer support agent that handles Tier-1 questions, creates and updates tickets, and chases stale ones. From here:
- Deploy the agent to a real channel — email, web widget, or WhatsApp — from your agent's dashboard.
- Sign up for a Lua account if you haven't yet.